Good Enough for an Exhibit: Printing and Framing Your Work for an Exhibition
Hi, everyone
I hope you are having a great day.
As I mentioned in one of the “definitely not a blog posts”, two of my black and white images were juried into the annual “Fine Art of Photography” exhibit at the Plymouth Center for the Arts. It is an amazing show (running May 17th - June 22nd). It is well worth the visit for the many amazing works showcased there. If you can’t make it to the Center, you can visit the online gallery here.
The jurying process is very competitive, and I was honored to have two images get into the show.
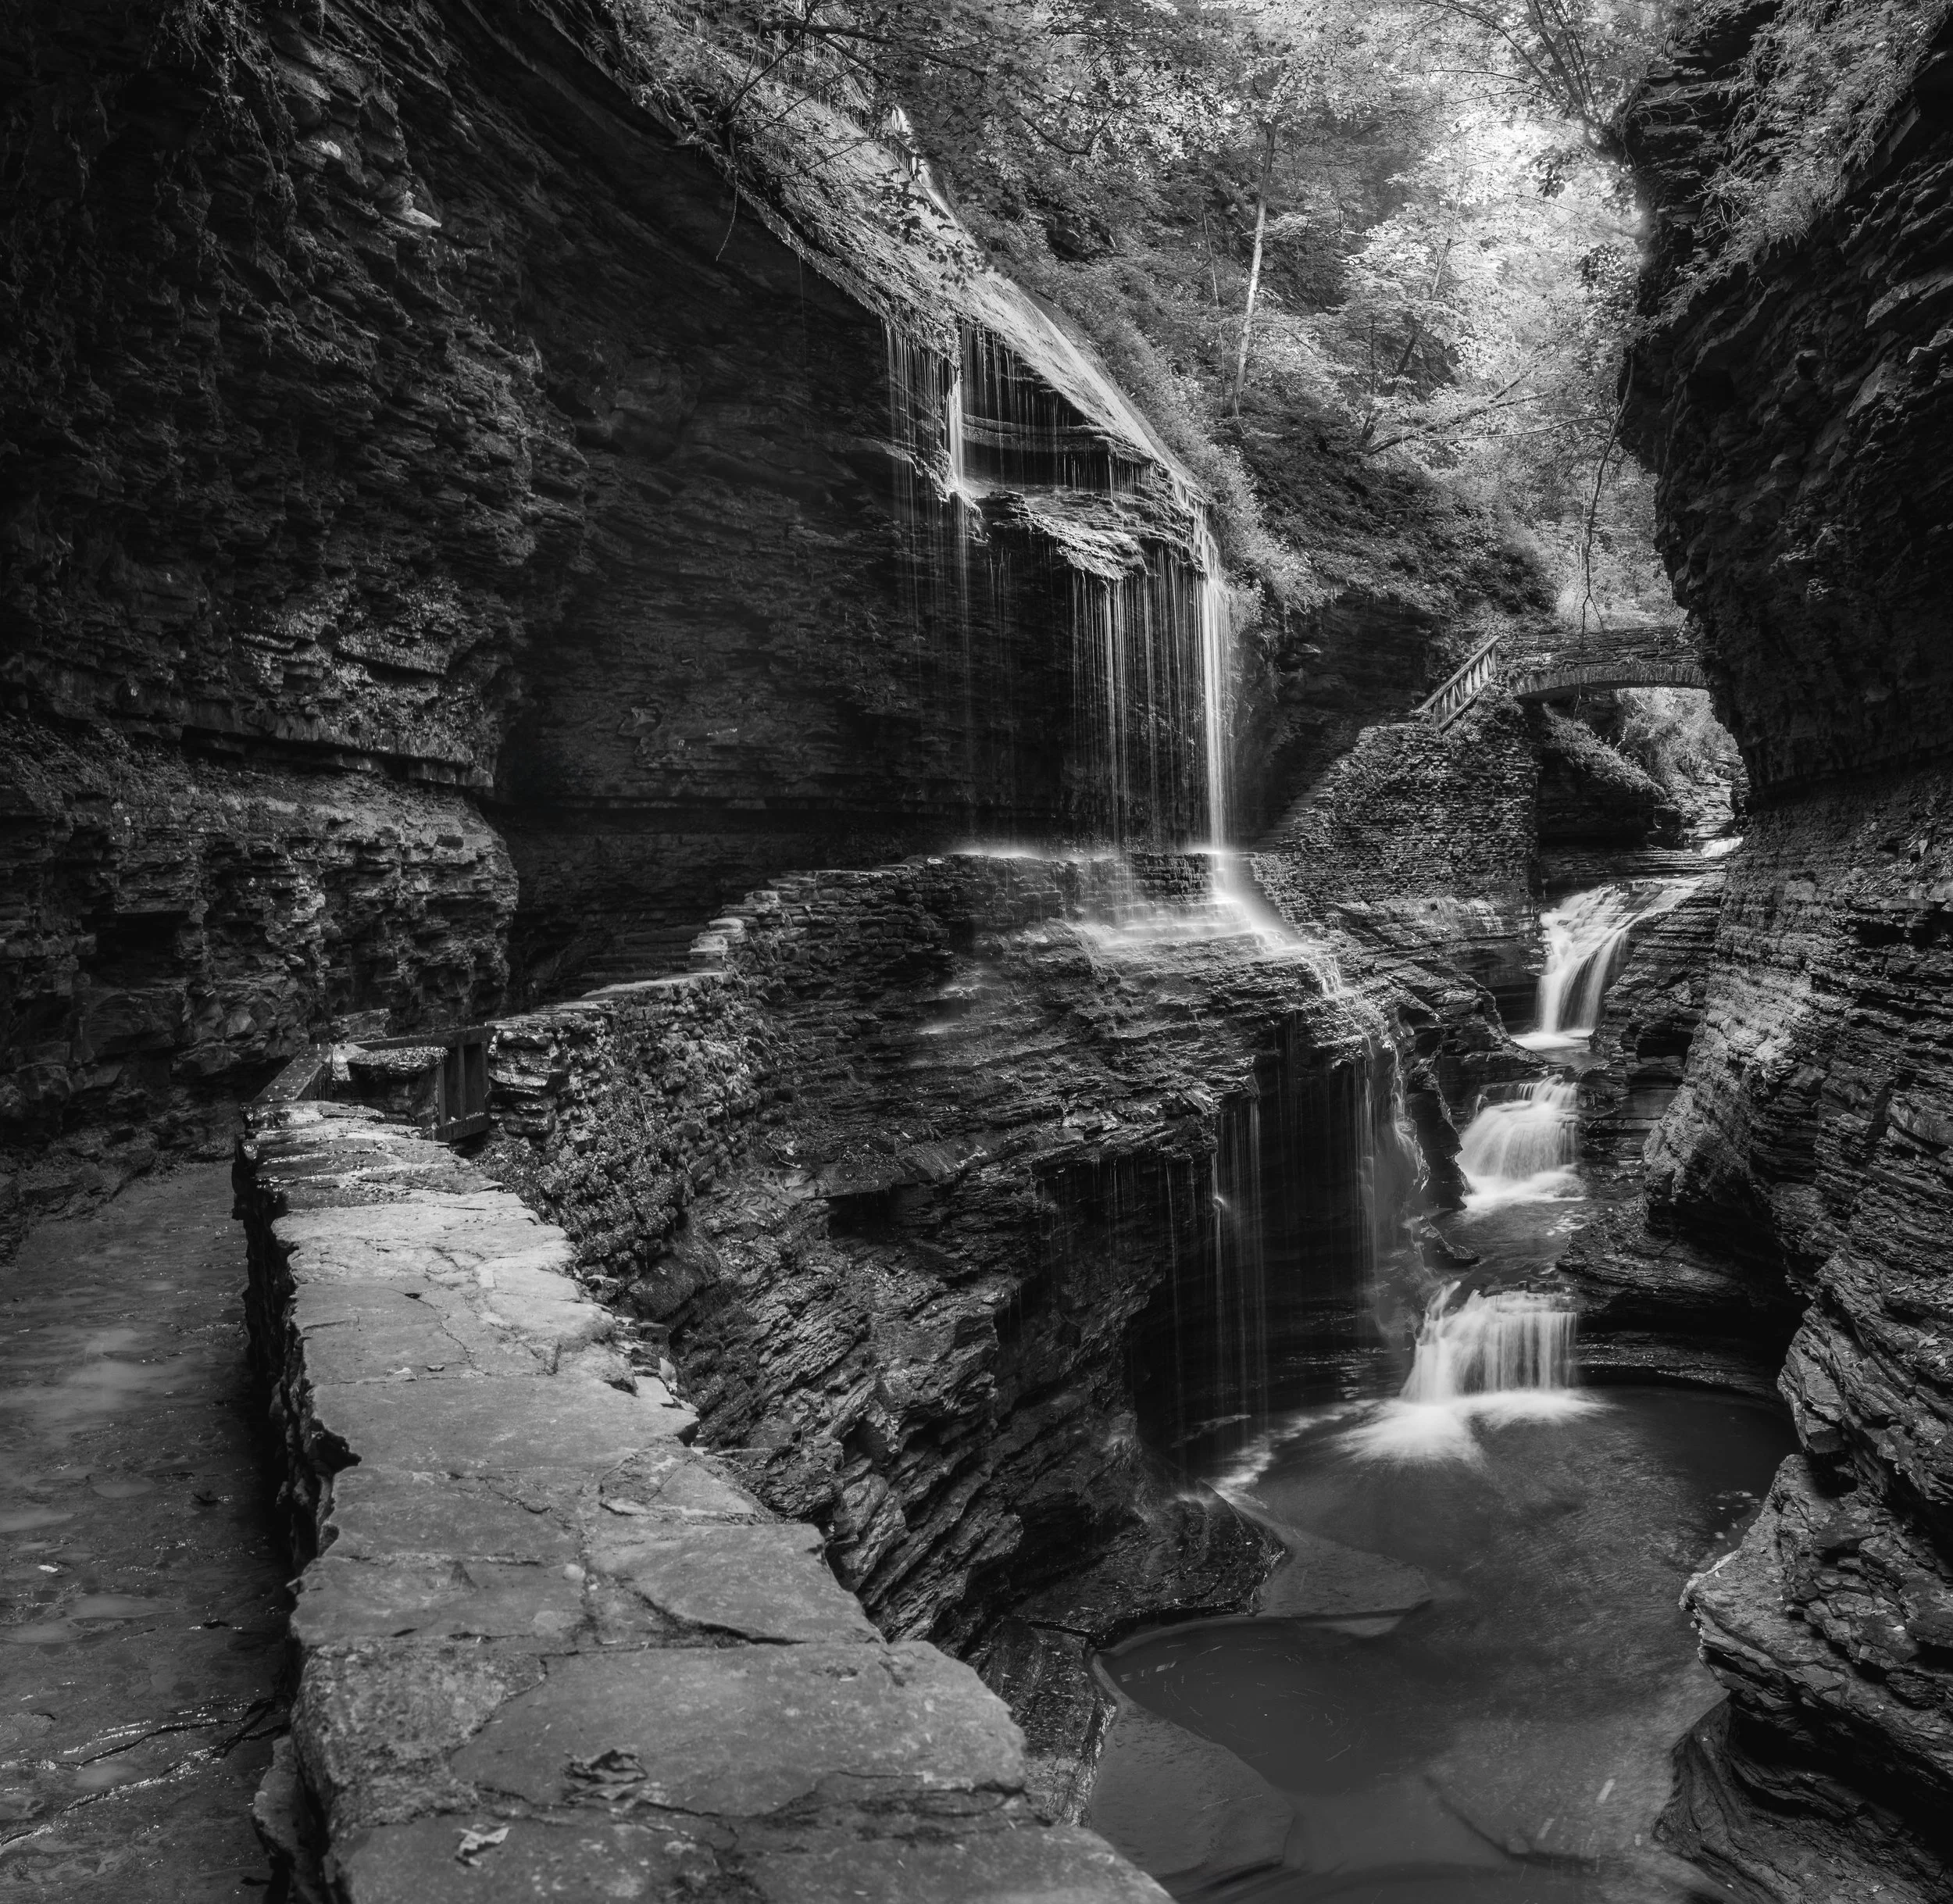
Where Shadows Lie. Watkins Glen
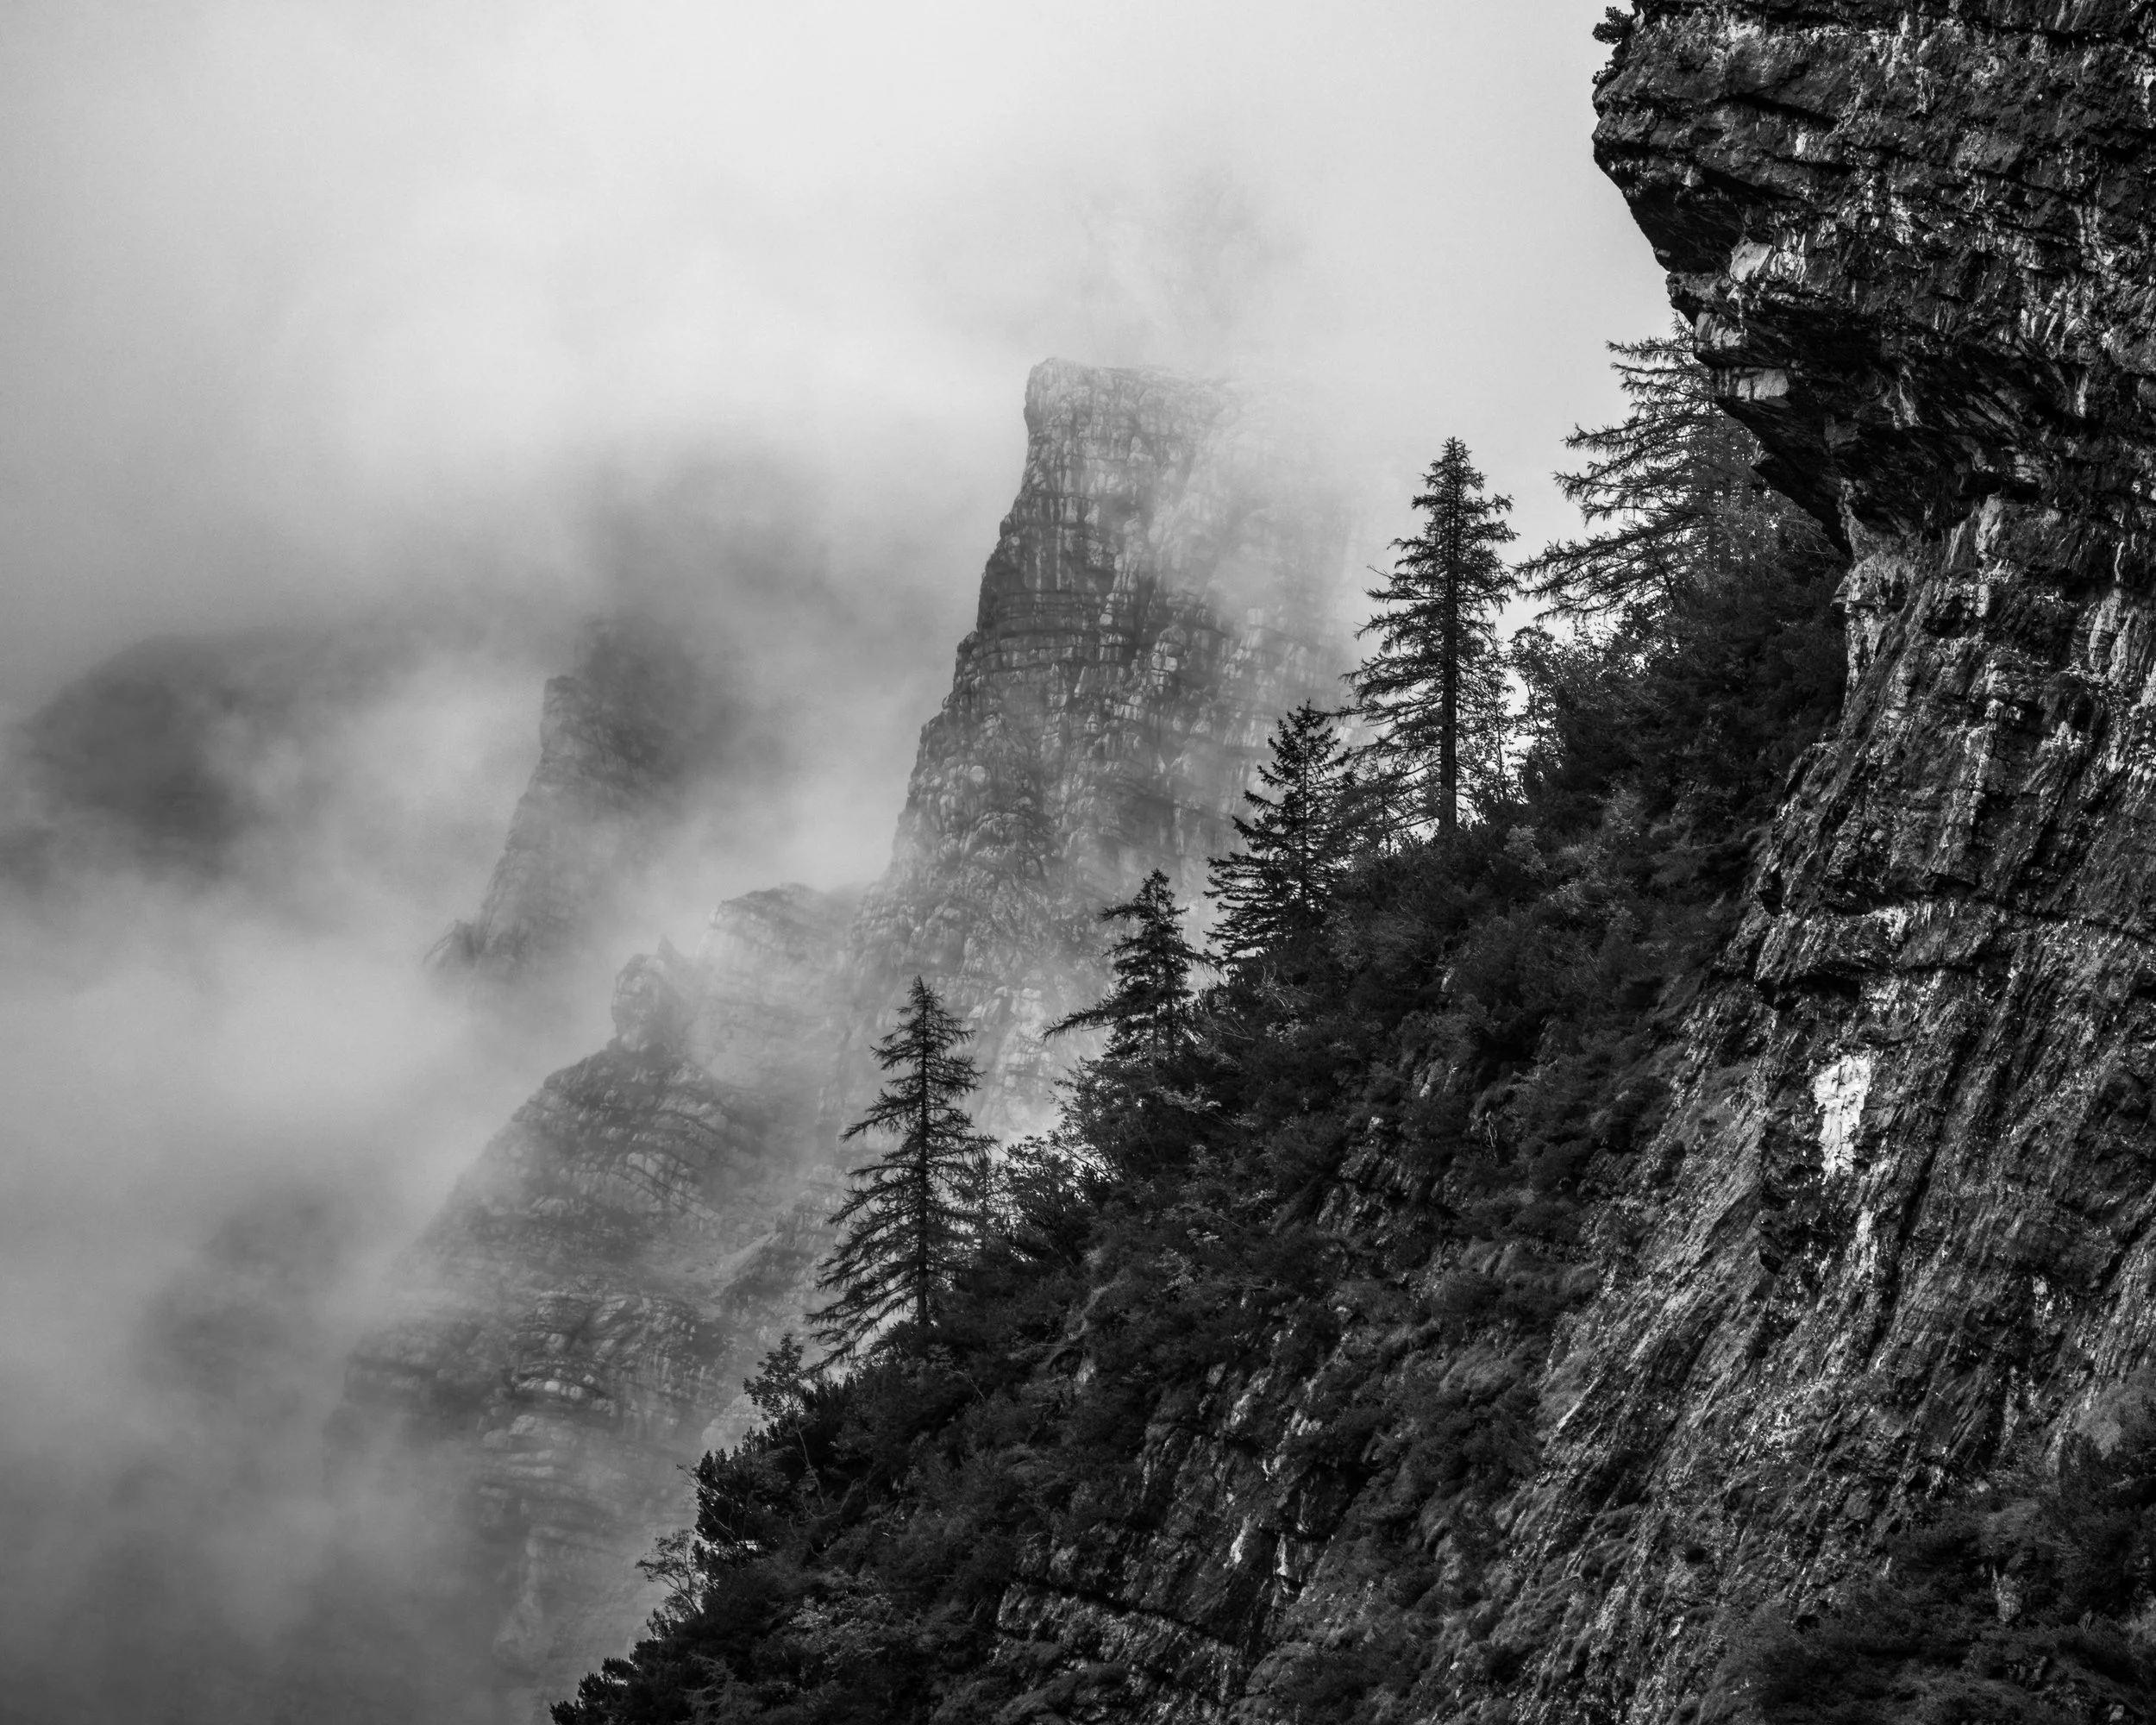
Misty Mountains in Black and White
Getting your images juried in, is only half the job. The next step is to print and frame them.
I decided to use the opportunity of printing and framing one of the images to record two videos showcasing how I go about printing and framing my work.
Printing is an art within itself. It is one of the most important aspects of a photographer’s work. Contrary to the popular belief, it is not about making your print look like your screen. That’s impossible, since the screen is backlit. Then, if it is not about that, what is it about, you might ask. It is about finding the right paper and the right printing settings to get a result you are happy with, a result you are proud to showcase. It is a subjective process, often with no right or wrong answers. Paper choices are always personal.
In the first video I compare three different papers — standard lustre paper, UltraPro Satin from Red River Paper; smooth Art paper, Aurora Art White, also from Red River; and a textured art paper, William Turner, from Hahnemuhle.
I’ve been using the Epson ET-8550 ecotank printer for the last half a year. It is a unique printer that has a combination of dye and pigment-based inks. As a result, this printer is both more capable than many other dye-based printers, but is also somewhat temperamental. In the video, I show how to nail your print settings by using small sample prints, before you go to print large.
In the end, I print several large prints and compare them.
In the second, follow-up video, I settle on one of the prints, and go over the framing process, starting from trimming the prints, through the matting process, and finishing with the hanging hardware (many exhibits do not accept saw-tooth hangers). This framing process is about making your work look professional, as well as choosing the right frame to complement your image.
I hope you will find the videos useful and they would help you in printing and framing your work.
Have a great day
Dimitry